Core Concepts
Postie allows you to create a post by sending an email to a special email address. Postie eliminates the need to log into your WordPress to create a post, you can just send an email instead.
Think of Postie as your personal WordPress assistant. You send your assistant an email and they take care of all the details of getting your content into your WordPress.
The first thing your assistant needs is an email address for you to send your content to. The easiest way to do this is to set up a free email account with Gmail. Pick something easy to remember such as your site name. We’ll use mypostiesite@gmail.com for sake of example.
Note that Postie knows who is allowed to post on your WordPress so you don’t have to worry about people sending you spam and having it show up on your site. Just like a good assistant would do!
First: Configure Gmail
Before we can configure Postie there are a couple of things we need to tell Gmail since Postie is not actually a real person it can’t log into Gmail in the normal way you and I would.
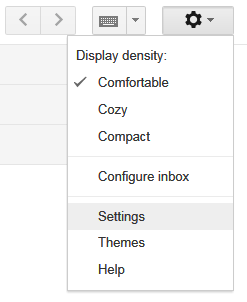
Log into your assistant’s account (mypostiesite@gmail.com) and in the upper left there is a “gear” menu. Click on it and choose “settings”
Across the top there is a list of tabs. Click on “Forwarding and POP/IMAP”

Look about halfway down for the section titled “IMAP Access” and click the radio button (little circle) in front of “Enable IMAP”
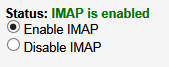
Lastly at the bottom of the screen click the button “Save Changes” Now Gmail is ready to have Postie log in and check for email from you.
Install Postie
Log into your WordPress and install Postie if you haven’t already.
To install Postie:
- Go to Plugins > Add New.
- Type “postie” in Search Plugins box and press the enter key.
- Find Postie in the results.
- Click Install Now.
- The resulting installation screen will list the installation as successful or note any problems during the install.
- Click Activate Plugin.
- Postie is now installed and ready to be configured.
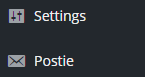
You can tell if Postie is installed and activated by looking for the Postie option on the left hand menu under Settings.
Basic Postie Configuration
Like any assistant, Postie needs to know how to log into the email account you just set up so it can get the emails you send.
Click on the Postie menu to bring up the configuration screen.
At first we are only going to concern ourselves with the first 6 settings.
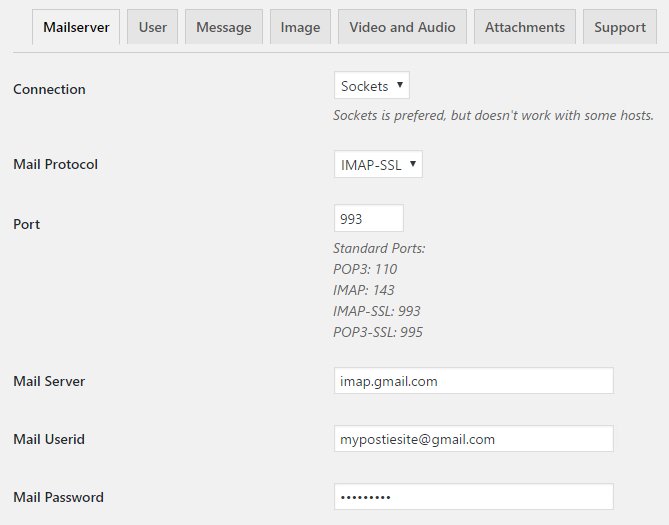
The following settings are correct assuming you are using Gmail. If not you will need to check with your email provider.
Set Connection to Sockets.
Set Mail Protocol to IMAP-SSL.
Set Port to 993.
Set Mail Server to imap.gmail.com.
Set Mail Userid to your full email address
Set Mail Password to the password you created for this email address.
When everything is correct, click Save Changes.
Note that Gmail now requires that you set up an “app password” see https://postieplugin.com/postie-gmail/
Check Your Settings
Once you are reasonably sure the settings are correct it is time to see if your assistant can check their email.
At the top right of the screen click the Test Config button.
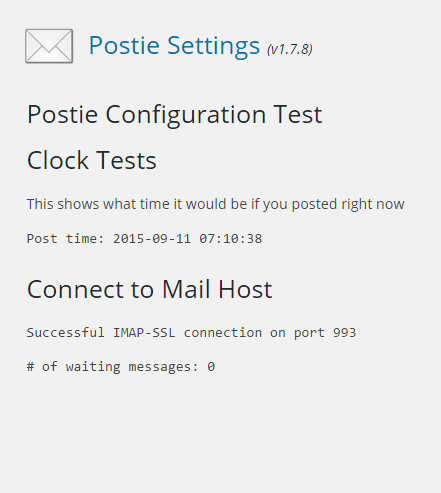
Postie Configuration Test will show:
Clock Tests indicates exact time your assistant is posting the blog.
Connect to Mail Host will indicate what port your are connected and if you are successfully connected with the server. Also displays the number of messages waiting to be posted. See Example below:
Successful connection shows:
Unsuccessful connection shows: Unable to connect error. Make sure to double check the settings and run again the Test Config Button.

For more information see this page on Postie & Gmail.
Plain vs Styled
There is one fundamental choice you need to make with Postie and that is whether you want it to use just the plain text from your emails or the styled text.
Message Tab is where you customized messages to be posted. There are 2 option to choose for the text type. The plain text and the HTML.
Plain Text
Plain text is just that – plain. That means there is no styling whatsoever. You can likely put styles into your emails that you send, but Postie is going to use the version without any style.
HTML
Html emails can have styling such as bold, bullets, tables, etc. Choose this option if you want to keep those styles. Note that it is possible to mess up your blog’s theme styling if you go too crazy with the email styles as they can conflict with each other. Not likely, but possible.
Text Fallback
Some emails only contain plain or html so what should Postie do if you pick “plain” but the email doesn’t have plain? If fallback is turned on Postie will use what is available.
Example Email
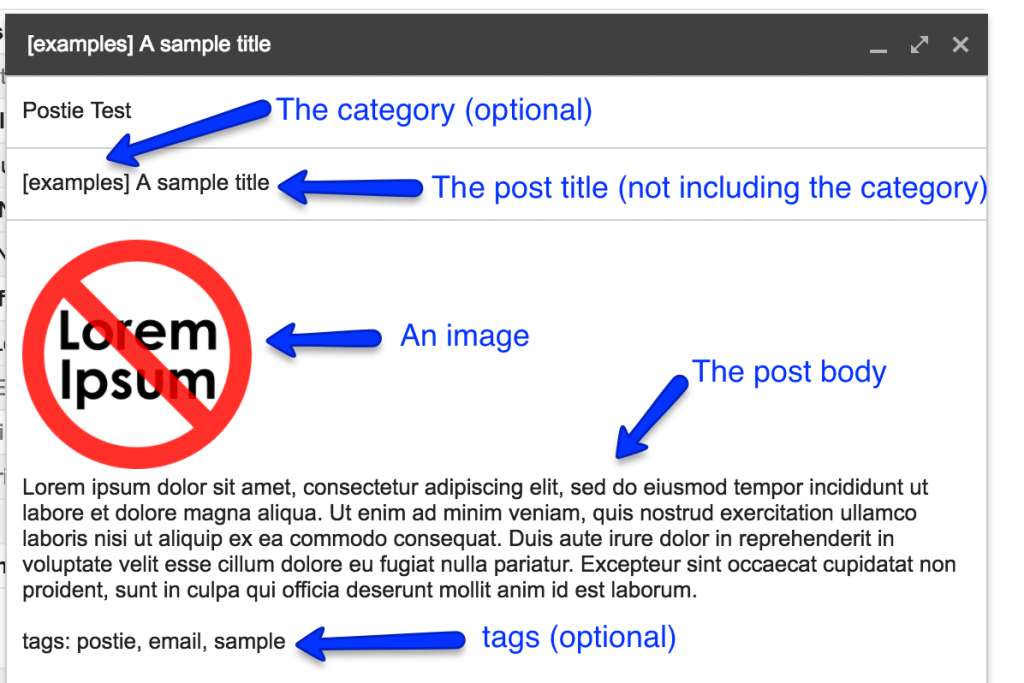
You can read more about the optional categories and tags.
Who Can Post?
You can let your assistant know who is allowed to send in email and get them put onto the site. By default anyone who is an administrator on your site can post (just as they could if they logged on).
In general you want a WordPress user for each email address that is allowed to post.
Under the Postie User Settings tab you will see additional options..
Changing the “Allow Anyone to Post via Email”
- YES would allow every single email that gets in to be posted. Don’t do this without a really good reason.
- NO means only authorized email are allowed.
Roles That Can Post option lets you choose the user level(s) that can create posts. You can change a user’s role by editing the user in the normal fashion.
Authorized Addresses is where to list the email addresses of anyone authorized to make a post who doesn’t have a WordPress user. It is highly recommended that you create users rather than use this setting. If an email does match an address listed here the default poster (below) will be listed as the author.
Default Poster is the WordPress user that will appear as the author for emails allowed from unregistered users.
AddOns
Postie has some commercial AddOns that either extend Postie in unique ways or provide a smooth integration with another plugin.
Extensions
Shortcodes
Control your Postie posts with shortcodes! With this AddOn you can control your title, post format, post type, comment control, post status, tags, categories, post date and excerpt using simple shortcodes, and a lot more new features too.
Category Per User
The Postie Addon for Category Per User allows you to assign each user a default category that gets used when Postie receives a message from a certain user. Each user will now have an extra setting: Default Category You can find this new setting…
Clean HTML
The Clean HTML AddOn takes the HTML embedded in your email and cleans it up and makes sure it is W3C compliant so that it avoids any issues with your blog. Saves hours of time fiddling with your posts. Can be optional…
Image Only
The Image Only Addon removes all text and uses the image template you set up in Postie for all attached images. Great for photo blogs where you just email picture in.
Integrations
Subscribe to Category
This AddOn ensures that Postie and Subscribe to Category work hand in hand. No configuration required, just install and activate and all posts Postie creates from your emails will be sent to your subscribers.
Polylang
Polylang is a great WordPress plugin for adding multiple languages to your site. This AddOn will allow you to specify the language of the post in the email subject.
Geolocation Plus
The Geolocation Plus AddOn allows you to add a latitude & longitude to a post in a way that works with the Geolocation and Geolocation Plus plugins. If your images have geolocation information encoded into them (as most images taken with smartphones do) then this AddOn will use that or you can supply the info in your email.
Open Street Maps
The Open Street Maps AddOn allows you to add a latitude & longitude to a post in a way that works with the Open Street Maps plugin (OSM). This gives you the ability to display a map with pins that represent of all your geo-tagged posts. A great option for a travel blog.
Where To Go From Here
Postie Support
Feel free to browse the support forums for more frequently asked questions.